Precision Vehicle Construction and Troubleshooting
Build the simplest complete system first. Add complexity only when evidence shows that it is needed.
Change one variable at a time
If several features change together, you will not know which decision caused the result. Make one purposeful adjustment, observe what happens, and record the evidence.
Suggested construction order
- Cut and reinforce the chassis.
- Position axle supports using measurements from the design plan.
- Install straight, parallel axles.
- Attach centred wheels and check clearance.
- Add the rubber-band connection and drive system.
- Rotate each part by hand before winding the rubber band.
- Conduct a short controlled functionality check.
Check before adding more parts
- Do both axles rotate freely?
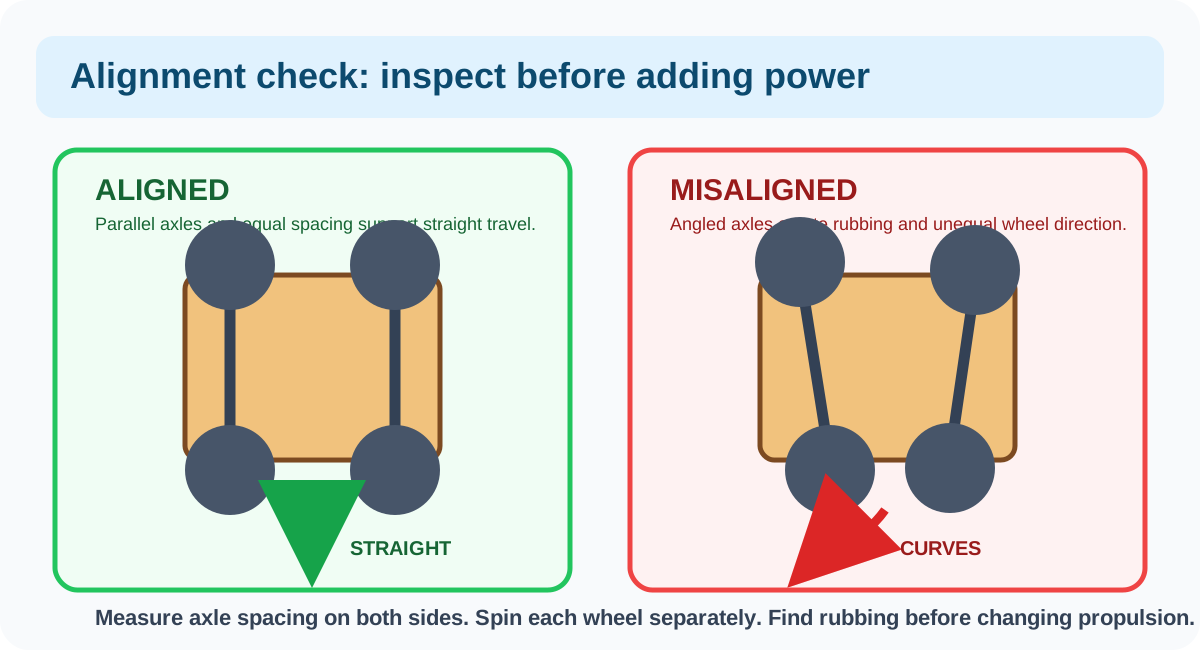
- Are the axles parallel?
- Do wheels clear the chassis?
- Are wheels secure and centred?
- Does the rubber band unwind without catching?
- Is the chassis twisting or flexing?
Troubleshooting table
Change one important variable at a time so the result can be interpreted.
| Symptom | Possible causes | Useful checks |
|---|---|---|
| Does not move | Rubber band not transferring force, axle binding, wheel contact, insufficient winding | Rotate axle by hand; inspect band connection and wheel clearance |
| Curves | Axles not parallel, unequal wheels, rubbing wheel, uneven chassis | Measure axle spacing on both sides; spin each wheel separately |
| Wheels spin without travel | Low traction, too much initial torque, unsuitable wheel surface | Reduce winding; inspect wheel contact with floor |
| Stops quickly | Axle friction, rubbing, misalignment, excess mass | Lift and spin wheels; locate contact points |
| Is unstable | Narrow track, flexible chassis, loose joint, uneven placement | Inspect from front and top; press gently to find movement |
| Results vary widely | Inconsistent winding or release, loose components, changing alignment | Standardize winding and release; mark starting position; inspect after each check |
Problem–cause–adjustment–result record
| Observed problem | Likely cause | One adjustment | Result and next step |
|---|---|---|---|
Safety
Tools and test areas
Complete the teacher’s safety instruction before cutting or using hot glue. Release vehicles only in the designated clear area.
- Complete teacher safety instruction before using cutting tools or hot glue.
- Cut on the approved surface and secure material before cutting.
- Keep fingers clear of blades and hot-glue nozzles.
- Allow glue to cool before touching a joint.
- Wind only enough for the permitted check.
- Point the vehicle away from people, computers, walls, and fragile objects.
- Retrieve it only after it stops and the path is clear.
AI-assisted troubleshooting
AI can help list possible causes or ask diagnostic questions when you provide specific observations. Use the AI guide, then verify every suggestion through inspection or a controlled physical test.